Webiny Enterprise
Advanced Tenant Management
Learn how to build a custom tenant management module using Webiny Headless CMS.
Webiny Enterprise license is required to use this feature.
This feature is available since Webiny v5.40.0.
- how to manage tenants via a Headless CMS content model
- how to programmatically install tenants
- how to change Admin app theme per tenant at runtime
Overview
Out of the box, Webiny provides a very basic module to manage tenants, called Tenant Manager. We’ve talked about this module in the article on Multi-Tenancy. This module allows you to create tenants, tag them, and assign custom domains for website routing (assuming you’re using our Page Builder to build your website). This works well for managing of a small number of tenants. However, if you need to manage hundreds, or even thousands of tenants, that UI will quickly become unsuitable for the task.
Building a tenant management system to satisfy a wide variety of business use cases is difficult, because every business domain has its own definition of a tenant. In some projects, a tenant would be represented by a “Company”, in other projects, tenant would be a “Brand”, etc. Webiny allows you to use the tenancy API to closely integrate its tenants (used for data separation), with your business domain, and have a flawless tenant management experience, which follows your business rules.
Goals
In the next couple of sections, we’ll explain how you can build your own tenant manager, which perfectly fits your business and your business terminology, using Headless CMS and the programmatic API for multi-tenancy.
We’ll implement the following items:
- a content model that represents a tenant in the context of your business domain
- a GraphQL mutation to execute Webiny tenant creation and installation
- a custom table column to trigger the GraphQL mutation from the UI
- apply custom tenant theme (colors and logo) to the Webiny Admin app
 Content Model and Group via Plugin
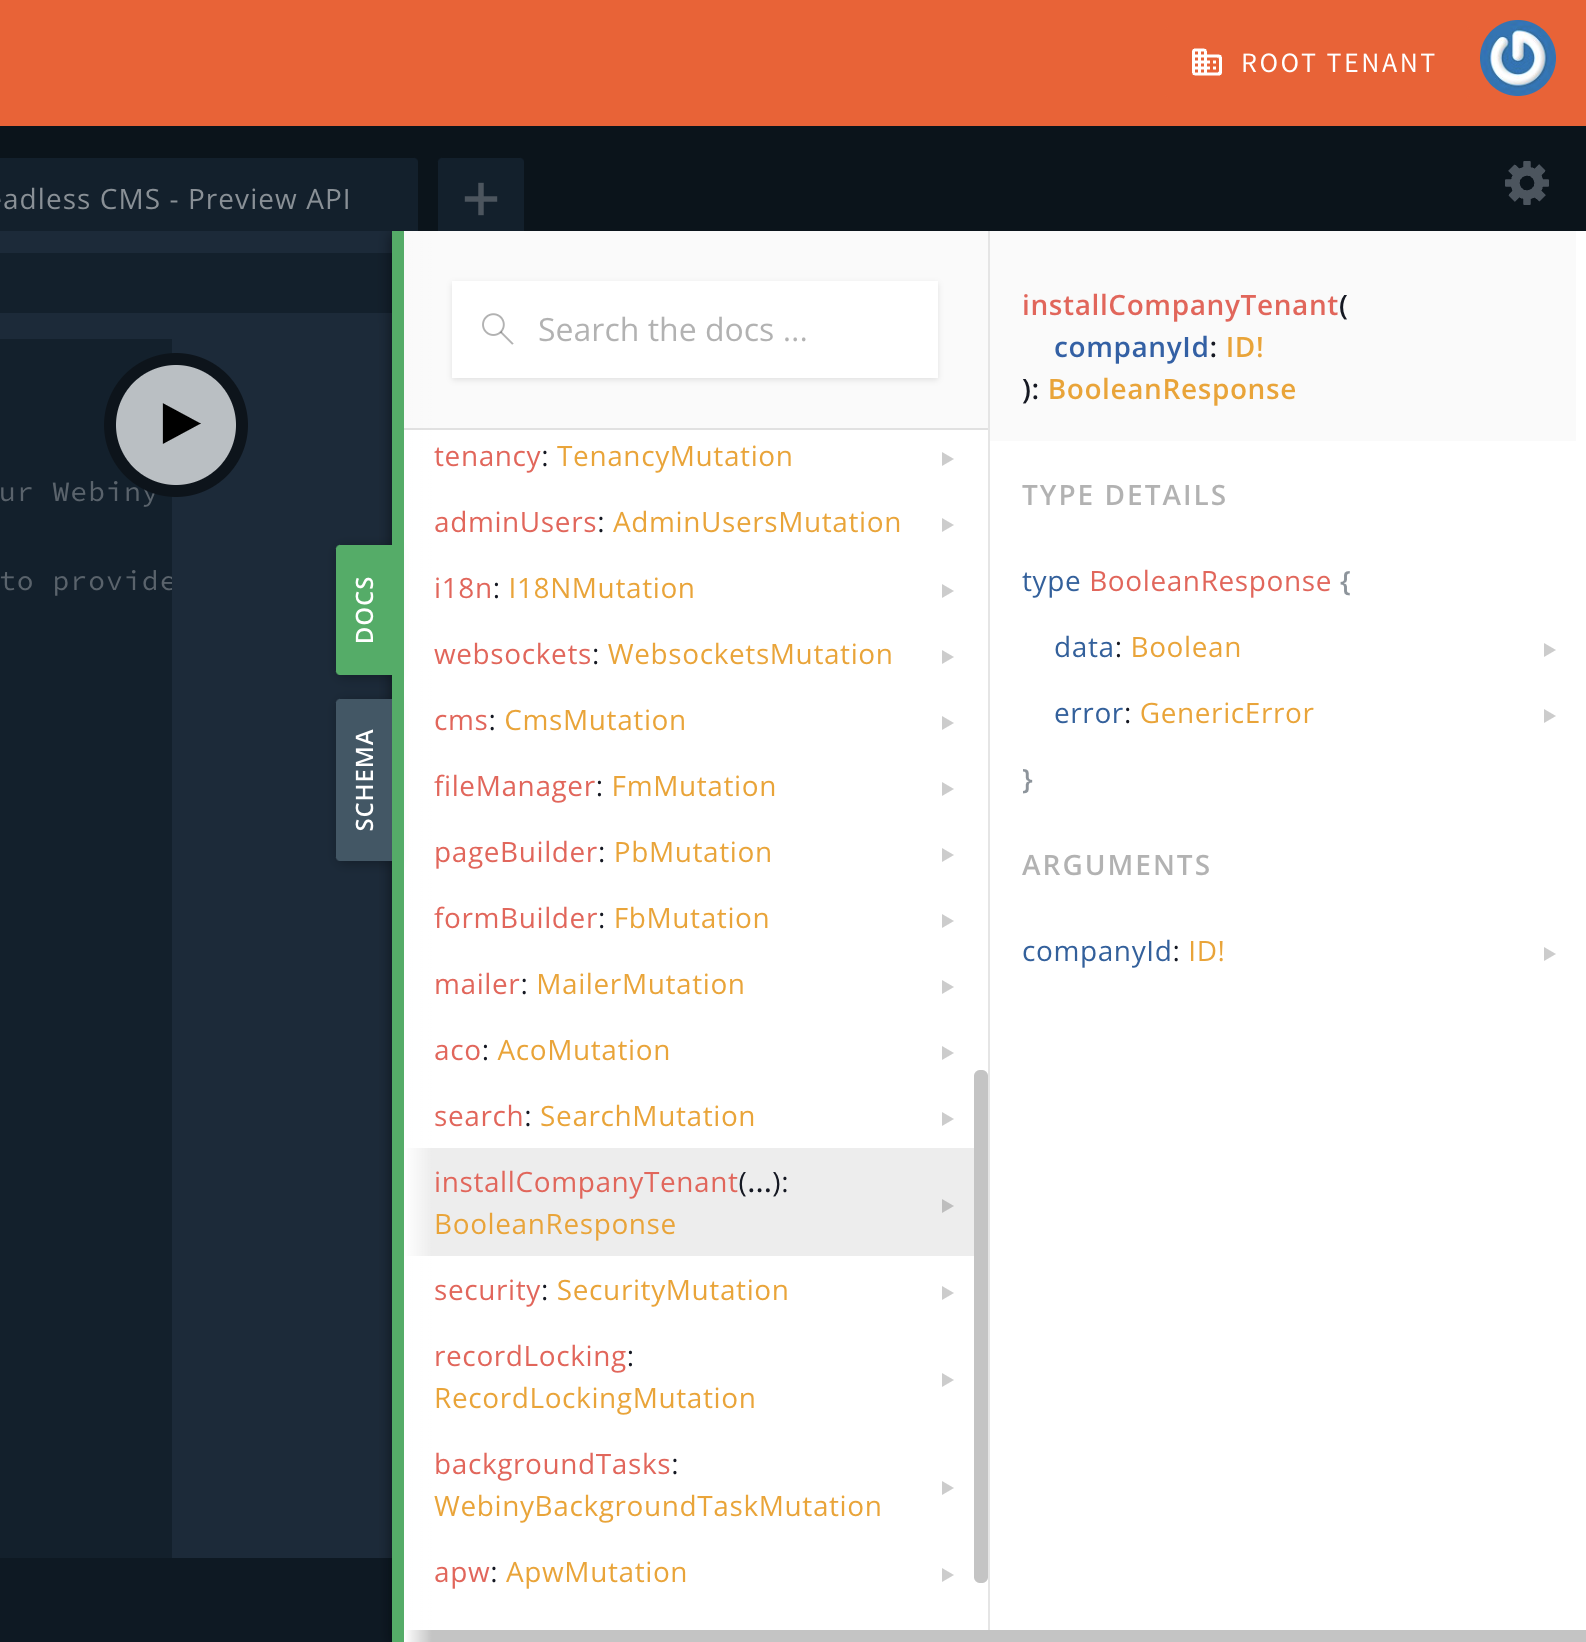 GraphQL Mutation to Create and Install Tenants
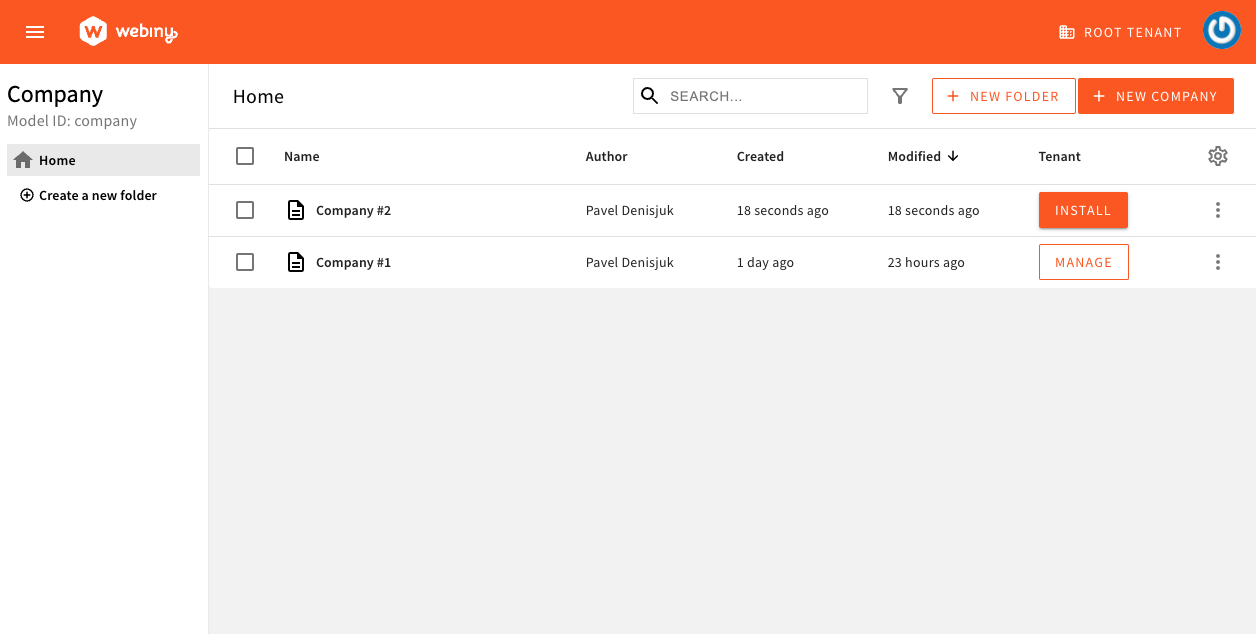 Company Entries
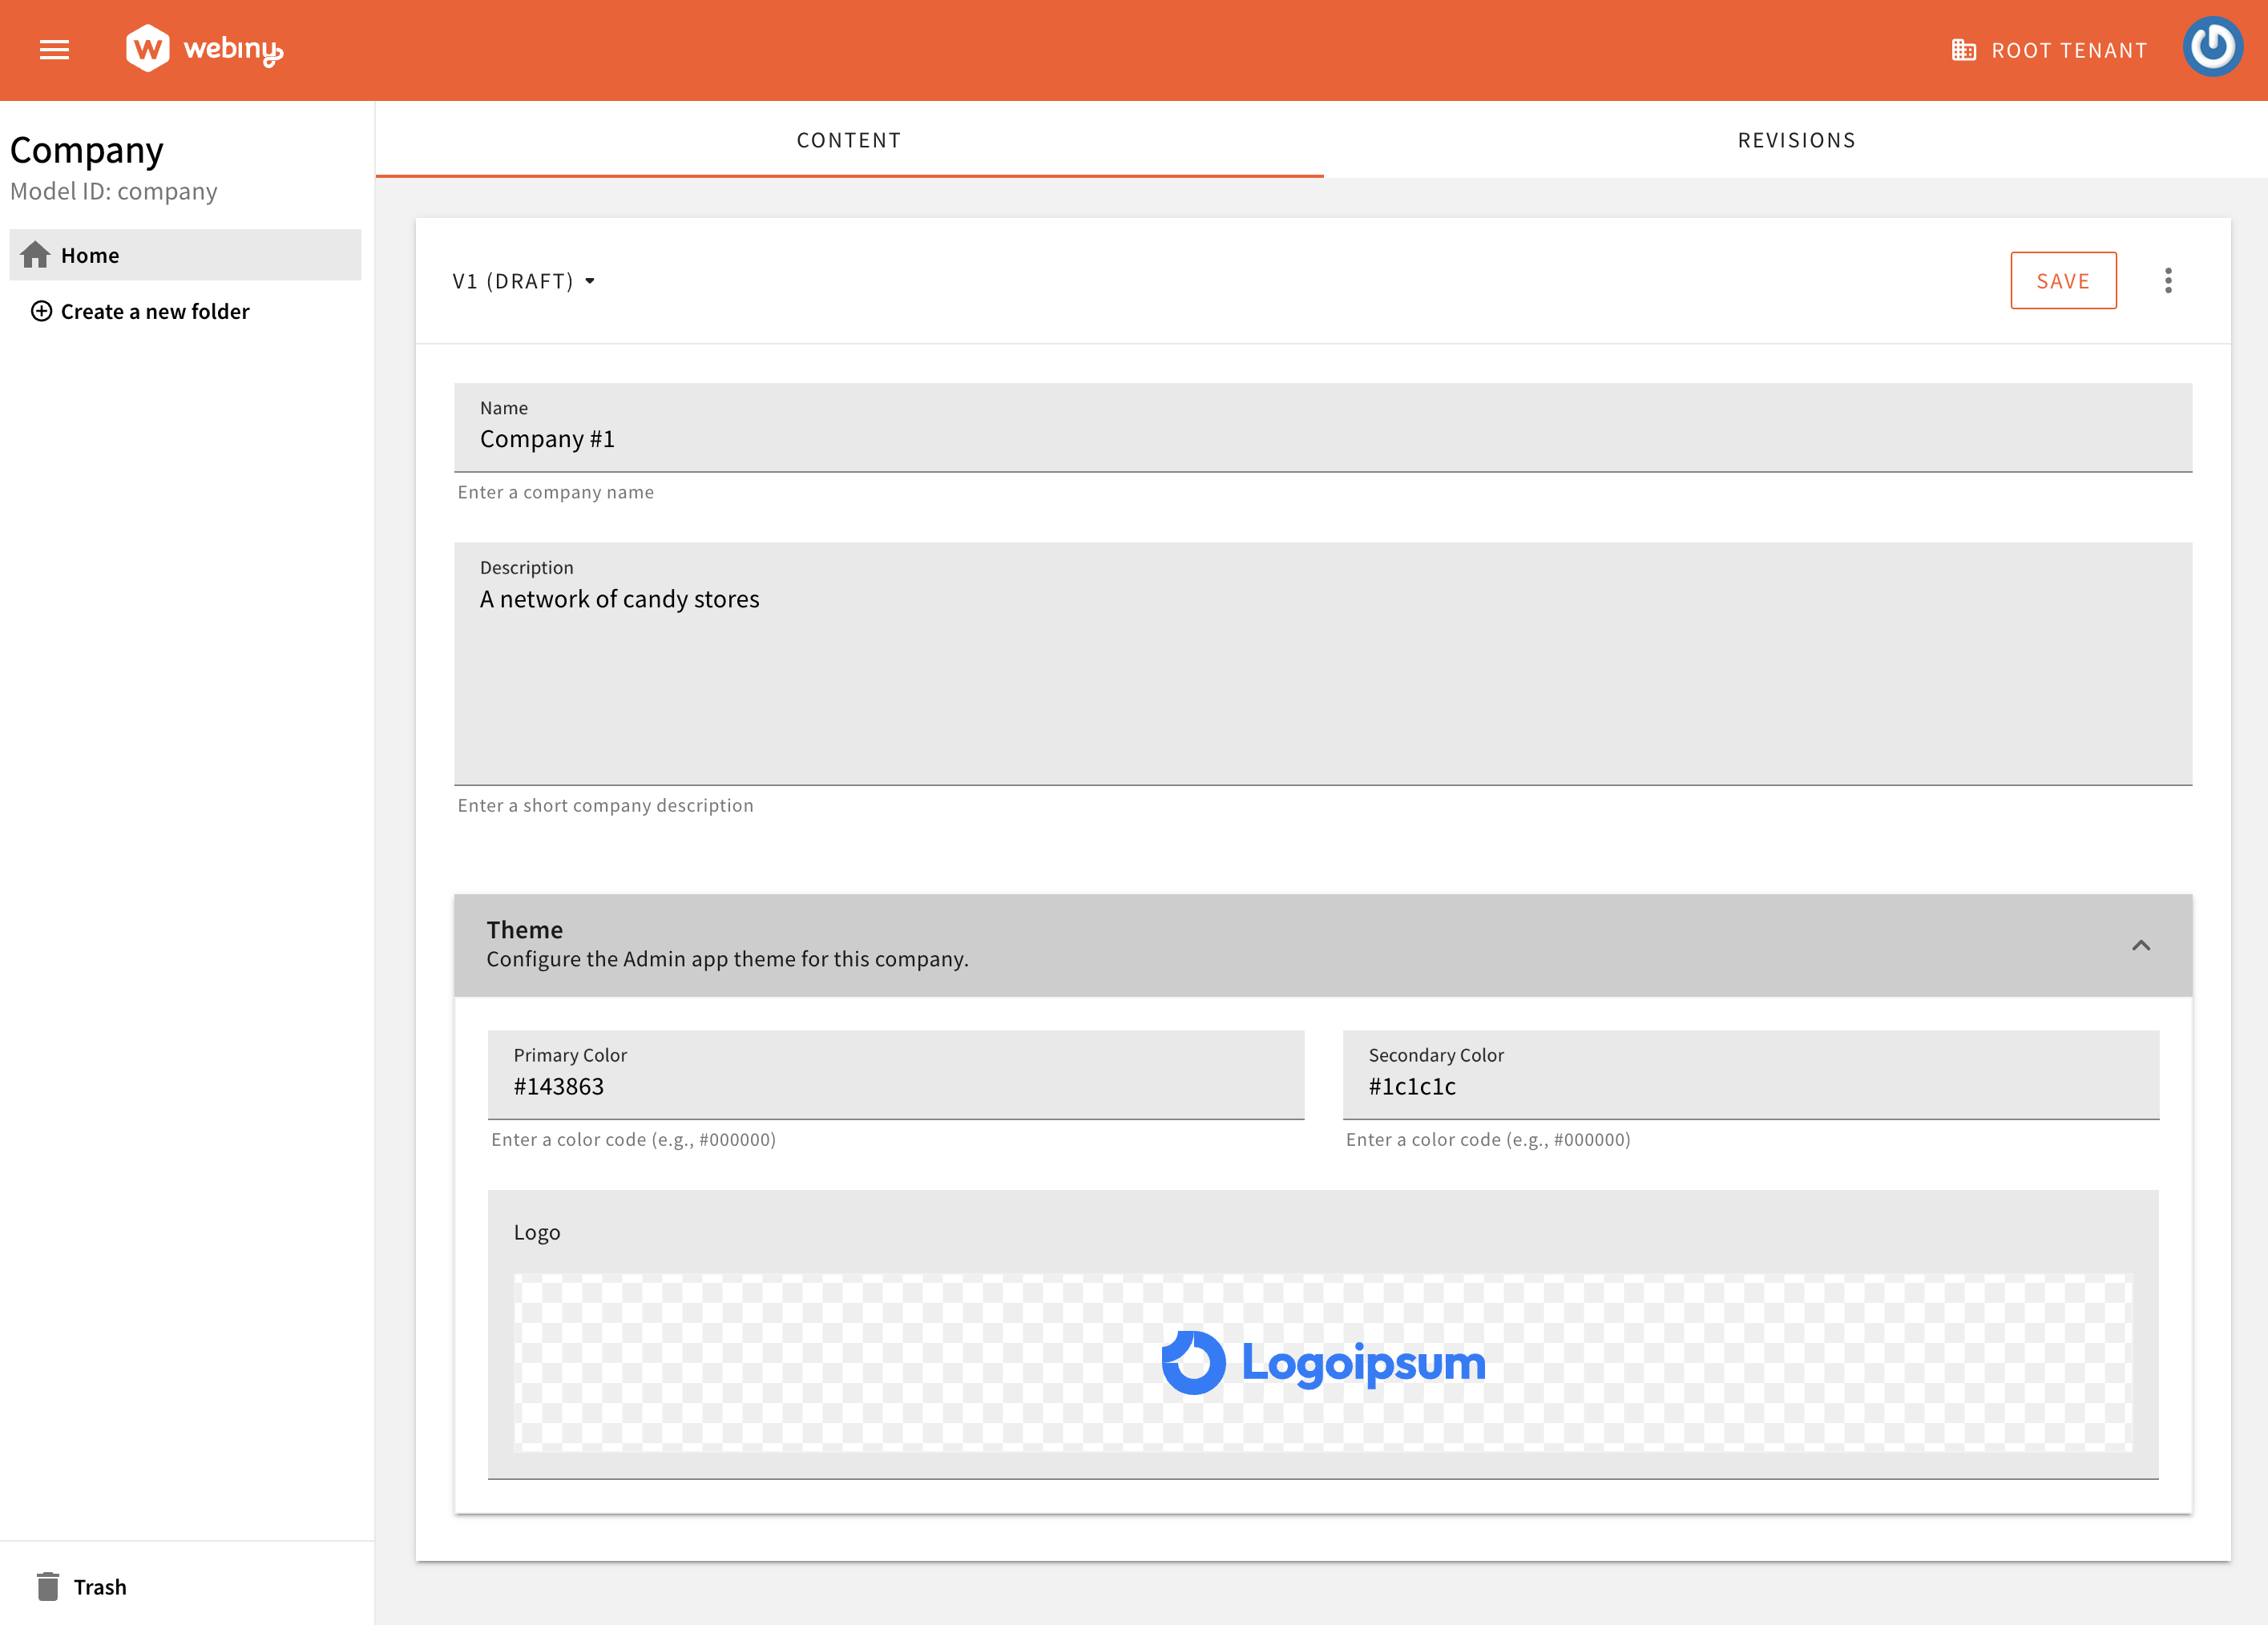 Company Entry Form
 Custom Tenant Theme
The full source code for this article is located in the Webiny Examples repository. Instructions on setting up the demo source code in your own project are located in the README.md file next to the source code.
In this article, we’ll be referring to the full source
code hosted
in the Webiny Examples repository, and only describing the process and the outcomes.
Tenant Content Model
To begin, we need to create a content model which represents a business tenant in our system, which we’ll use to create the low-level tenants within Webiny. We’ve created a content model plugin via code, as described in the Define Content Models via Code article.
In our example, we named our model Company, and created a few basic attributes: name, description, theme (with primaryColor, secondaryColor, and logo attributes), and a hidden boolean attribute called isInstalled.
As you develop your system, you will most likely have many more attributes, but this should be enough to describe the concept and the mechanics involved.
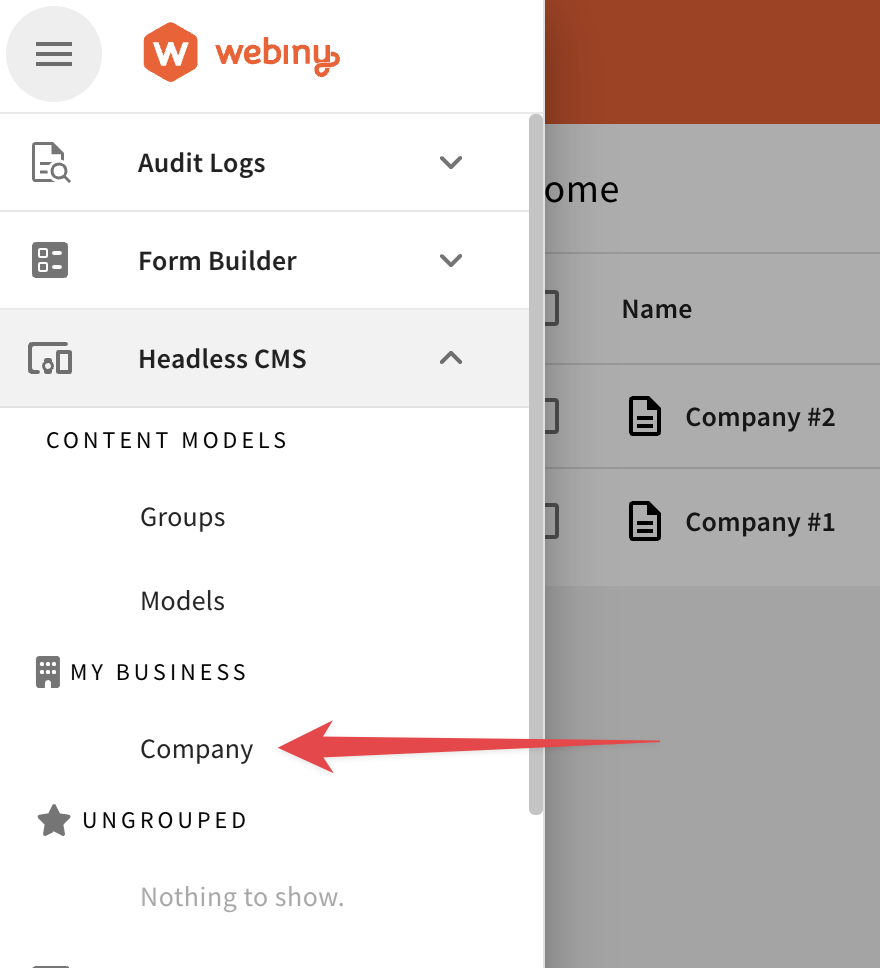
When deployed, this content model will appear in the navigation menu under our custom content model group, and we will be able to create new Company content entries:
Content Model and GroupCompany Entry FormCreate and Install a Company Tenant
Now that we have our Company model, we can implement our first use case: Create and Install Tenant. This use case takes a company id, loads the content entry using the programmatic Headless CMS API, creates an internal Webiny tenant, and installs it. We create a tenant with the id of a Company content entry, to have a 1:1 connection between a Webiny tenant and your business entity.
This use case class encapsulates a business scenario, and you can run it from different parts of Webiny. Our goal is to be able to run this use case by issuing a GraphQL mutation, and so, we need to create a GraphQL schema plugin next.
GraphQL Mutation to Create and Install a Tenant
The following GraphQL schema plugin exposes a mutation which takes a company id, and runs the CreateAndInstallTenant use case.
GraphQL Mutation to Create and Install TenantsThis is just one way of running a use case; you could achieve the same by implementing a custom REST route, or a background task, to install a company in a completely asynchronous manner.
Keep in mind that, if you plan to seed your new tenant with data, depending on the amount of data you’re seeding, you will most likely want to move that logic to a background task, since it’s not limited by a 30 seconds API Gateway request timeout. Tenant creation and installation could still be executed as described in this example, but to seed a tenant, you would invoke an asynchronous background task.
Table Column to Install and Access a Tenant
Now we need to add a piece of UI, in our example it will be a button, to trigger tenant installation. The table customization API is documented in the Customize Entry List Table Columns article.
Company EntriesThe “Tenant” column we’ve implemented has several purposes. It relies on our model’s isInstalled attribute to determine whether the tenant has been created and installed. If the tenant hasn’t yet been created, it will render a “Install” button, otherwise, it will render a “Manage” button. Clicking the “Manage” button will switch the Admin app to that tenant.
Disable Company Publishing
In this demo, we hide all actions related to content entry publishing, as we don’t want the Company content entries to be published. We simply keep them in the draft state. This makes it easier to update data programmatically, since you won’t have to deal with content revisions.
The way we do it is, we decorate the usePermission hook, and we always return false for canPublish() permission check on the Company model. This, in turn, affects all the UI that uses permission checks.
This customization is optional. If you do want to allow Companies to be published, you will have to make some changes on the API side of things. There are pros and cons to both approaches, so do reach out to us on our community slack and we can discuss the best way forward for your project.
Tenant Theming
Each Company is allowed to have its own brand attributes, like colors, logo, etc. The ApplyTenantTheme component demonstrates how you can programmatically modify the Admin app theme, when a user is accessing the Admin app for a particular Company.
Custom Tenant ThemeIn our demo, we’re only showing customization of colors and logo, but following this approach, you can customize pretty much anything related to the UI: navigation menu items, dashboard, columns, even functional plugins.